
Most artists will only show you a successful piece of work. Here, I will bare all and show you most everything, because I always think we can learn from our mistakes or failed works.
After a successful (well, I thought so anyhow) first attempt with the Gelling Printing, I went to the beach and the woods to collect some more material for my printing. I was very excited about printing with found items.
Firstly, I started with some seaweed I found on the beach.


I had been starting off by using my sketchbook to lift off the first print. As you can see, that didn’t work out so well. Neither did the ghost print on my deli paper. So, I tried a different approach.


This time I used the Deli paper to take the first outline print. This was easier as I had a single sheet of paper in my hand and I was able to press around the seaweed, rather than putting my sketchbook on and hoping for the best. You see, seaweed can be quite curly and lumpy and bumpy as there are pods in them. I am happy with these prints for now. They look more like coral, but I am ok with that and have some ideas on how to use these in a painting. The ghost prints didn’t turn out well at all, but more on that later.
As seaweed printing wasn’t very productive, I proceeded to continue printing with my haul from the woods. Leaves are good. They are relatively flat and you can get some good detail from them.


The first and last print are in my journal (where I took two outline prints) and the middle is the ghost print on deli paper. When I pull off my leaves, I tend to stick them on the outline print and roll them out quickly to pull off the paint from the leaves to make a print. Sometimes it works. I superimposed two ghost prints on the deli paper.
Some leaves are better than others, but not these.


I had some loose leaves that I found on a broken branch. The print on the left is the outline print in my sketchbook. When I pulled off the leaves for the ghost print, I put them in the white spaces in the sketchbook and rolled them out. The ghost print on the right is on deli paper. I then rolled out some yellow and put the leaves back on and used them as stamps for the outline print. It is not so easy to see how they came out. I then picked up what was left over with the deli paper, but it didn’t come out that great. I may need to work on this some more. I can see some interesting shapes in the white spaces.
Ferns are great for printing with. They are flat too!


The ghost print wasn’t so great on the last one, but I still like it as it is different. So, what about the ones that didn’t quite make it as a mono-print?


If you open these photos you might be able to determine what the ghost print was supposed to be. Rather than throwing out the deli paper, I decided to use them to lift off the paint from the gelli plate. What I got is some interesting textures. There are about 3-4 layers of paint on each of these. The first one looks like a stone wall with some plants in front of it, to me. I am sure I can do something with this one. As for the others, I am not so sure. I may need to turn them around to see if there is anything of interest to pick out to paint. If not, I might just print over them. These are what I call my fails, but only because they didn’t turn out the way I would have liked them to. With printing, you never know what you are going to get, a bit of hit and miss, like life!


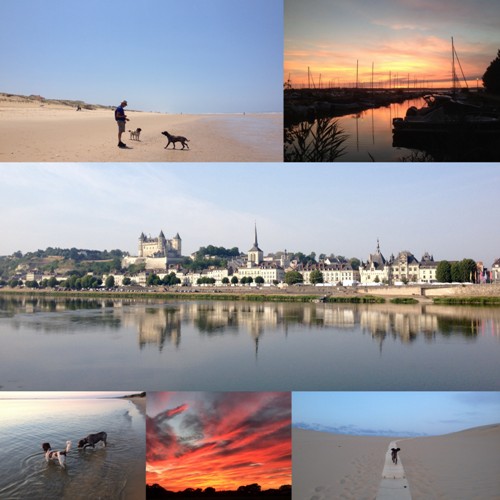 We camped at a lake south of Bordeaux for two weeks and then slowly made our way back to the UK in the last week. We camped at sand dunes and near some lovely villages and towns. We had some stunning sunsets. It was great, in spite of the heat wave! Even the dogs had a blast. They love anything to do with water. We even swam in the Loire River.


